A few weeks back, we walked you through the process of using our powerful Design Studio Software. But knowing how to use the software is only the first step. There’s a lot more that goes into creating an awesome-looking shirt than you’d expect.
That’s why today, we’ve got another walkthrough for you. We’re going to go over everything that’s involved in dreaming up an awesome-looking shirt, from the principles of visual design to the elements of proper branding. By the time we’re done here, your toolkit will have everything necessary to come up with something incredible, whether you’re making a shirt, sweater, mug, or even a hat.
Step One: Choosing Your Clothing
Let’s ease into things. First question – what do you want to create, and why? Are you looking for a custom-printed T-shirt that you can use to add a bit of personal flair to your wardrobe, or do you want to print out a set of branded sweaters you can hand out to your customers? Are you printing off some sports uniforms, or a mug that you can use at the office?
Although you’ll follow the same basic compositional principles regardless of what direction you decide to take, it’s essential that you know exactly what you’re setting out to do before you start designing. Without a strong idea as a foundation, whatever designs you come up with will very likely fall flat. Bear that in mind moving forward.
Step Two: Understanding The Elements Of Visual Composition
Next, let’s take a look at some of the visual elements you’ll be using to put your shirt together.
Lines are linear marks that connect two points. They’re used to define shapes, create textures, and divide sections of an image. They’re used to define shapes, create textures, and divide sections of an image.
Direction is a quality of lines. According to Lovett, there are three primary ‘types’ of direction – horizontal, which suggests calmness, stability, and tranquility; vertical, which suggests balance and alertness; and oblique, which suggests movement and action.
“The element of direction can have a powerful influence on the mood of a design,” writes design expert John Lovett.. “It is something often overlooked, but making a conscious decision about the dominant direction in a painting can have a noticeable effect on the atmosphere of the work. Sometimes the subject will dictate the dominant direction. Sometimes the subject will allow you to impose a direction on it.”
Shapes like circles, squares, and triangles are an essential part of most visual design. These geometric shapes are precise and uniform, generally requiring a guiding tool like a ruler to draw. They aren’t the only shapes at your disposal, however.
A lot of the best designs make use of organic shapes; free-form shapes that are associated with things in nature. They generally lack a clearly-defined form, without straight lines or uniformity.
Texture is a shape’s surface quality – rough, smooth, hard, soft, or glossy. It can be either tactile or visual. Particularly where clothing is concerned, there are two types of texture. Physical texture is what you can actually feel with your hand, whereas visual texture is the illusion of physical texture – for example, the appearance of the heart on the shirt we designed in our previous guide.
Size is relatively self-explanatory: it’s how much surface area a shape or visual element occupies.
Also known as hue, Colour is, believe it or not, one of the more complex visual elements you’ll be dealing with. We’ll discuss some of the deeper principles behind it later on in this guide, but for the time being, here’s what you need to know:
- There are three Primary Colours: Red, Yellow, and Blue.
- Between those three primary colours are three Secondary Colours: Green, Orange, and Violet.
- There are also a number of Tertiary Colours which fall between primary and secondary: Yellow-Orange, Blue-Violet, etc.
- Finally, Compound Colours contain a mixture of the three primaries, and include things like browns, khakis, and earth tones.
- Value, or Tone is the lightness or darkness of a colour. We’ll discuss this more when we talk about Contrast later in the guide.
- Tints are made by adding white to a colour, while Shades are made by adding black.
“In order to mix pigments into clean saturated colours it is necessary to include a warm and cool of each of the primaries in your palette,” writes Lovett. “There is no such thing as a pure primary pigment, so when mixing green for example, choosing a cool blue such as phthalo and a cool yellow such as lemon ensures there is no trace of red in the green. Using a warm yellow like cadmium or a warm blue such as ultramarine would introduce a slight trace of red into the green resulting in a compound colour.”
- Typography is related to your font type, size, alignment, colour, and spacing.
- Form describes the volume and mass of three-dimensional objects. It’s one of the most complex visual elements in your arsenal. You can give the illusion of form by combining two or more shapes and enhanced through tone, texture, and colour.
Step Three: The “Big Four” Design Principles
Next, let’s talk about the four major principles of visual design. Although there are a great many others (which we’ll discuss at length in a moment), these four serve as the foundation. It’s imperative that you form a solid understanding of them.
Contrast
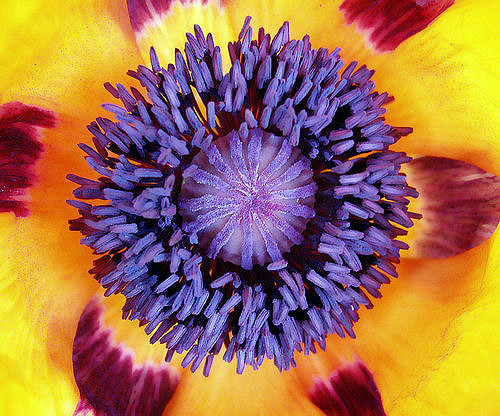
Contrast is the art of putting distinct elements next to one another to emphasize what makes them different – size, colour, direction, shape, et-cetera. It’s one of the best ways to make a design ‘pop,’ and one of the core ideas behind what makes something visually appealing.The contrast between red, yellow, and blue is what makes Superman’s outfit so visually striking, for example.
“Contrast is one of the most effective ways to add visual interest and to create an organizational hierarchy among different elements,” reads a lecture on visual design. “The important “rule” to remember is that for contrast to be effective, it must be strong…it is created when two elements are different. The principle of contrast states that if two items are not the same, then make them different. Really different.”
Repetition
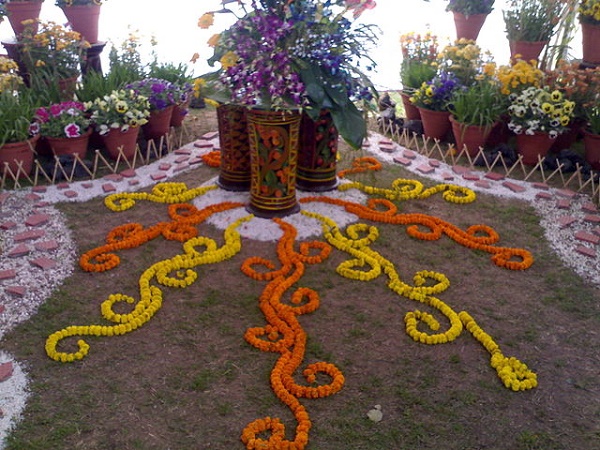
Both repetition and contrast serve to draw attention to particular elements of a design, though repetition works in a slightly different fashion. While contrast emphasizes differences, repetition highlights similarities, tying together individual elements for consistency and unification. Anything can be repeated in a design – for example, this article makes use of repetition in the uniformity of its headlines.
“Repetition helps organize information; it helps guide the viewer; it helps unify disparate parts of the design,” the lecture continues. “Sometimes the repeated items are not exactly the same objects, but objects so closely related that their connection is very clear.”
Proximity
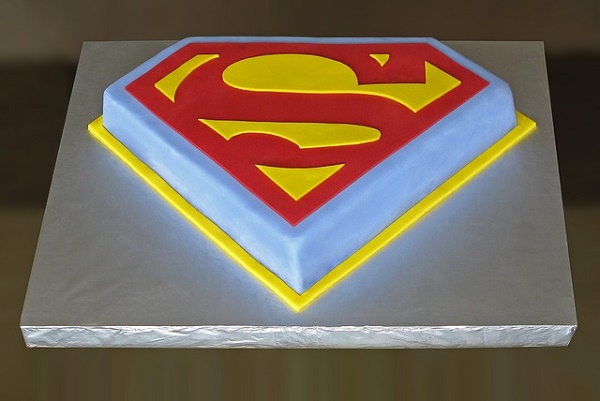
Proximity is a bit of a confusing term, in that it’s closely connected to both contrast and repetition. Generally speaking, the idea behind it is that if distinct visual elements are grouped closely enough with one another, the viewer ends up treating them as part of a whole. Superman’s logo is an excellent demonstration of this theory in practice.
“The basic theory of proximity is concerned with the arrangement or categorisation of elements that relate to one another,” reads a blog post by visual designer Tomato Soup. “To understand why, when elements of a similar nature are grouped together the information becomes a visual unit. This provides a viewer with a visual clue as to the concept you are communicating rather than being confronted with a scattering of unrelated graphical elements. When a number of graphic elements are close in proximity a relationship is implied. If elements are logically positioned they connect to form a structure to your design, this is also known as Visual Hierarchy.”
Alignment

Finally, alignment is a principle that maintains that no component of a design should be present arbitrarily. Every single element should have some visual connection with another element, and every single component should have its own role to play. Let’s refer back to the T-shirt we designed in the previous post – the heart, the art splatter, and the texturization were all visually connected to one another; when we added elements that seemed disconnected or out of place (like the emote on the shirt’s back), the design started to look cluttered and garish.
“Unity is an important concept in design,” explains the lecture. “To make all the elements on the page appear to be unified, connected, and interrelated, there needs to be some visual tie between the separate elements. Even if the separate elements are not physically close on the page, they can appear connected, related, unified with the other information simply by their placement.”
Step Four: Other Design Principles
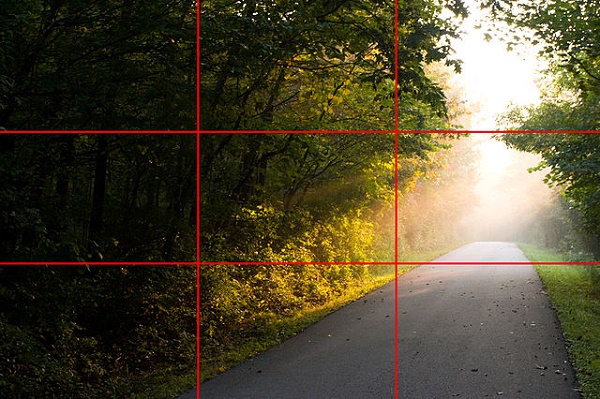
Image Credit: John R. Daily
Next, let’s take a look at a few additional design principles, all of which are closely related to the “Big Four.”
Positive Space is the areas in a visual design that are meant to draw the attention of the viewer. Negative Space, meanwhile, refers to the regions of a visual piece that aren’t the subject of interest – generally speaking, Negative Space can also be referred to as “Blank Space” or “White Space.”
Neither can exist without the other – for every positive element in a design, there is negative space surrounding it. Without Negative Space, your design will start to look extremely cluttered.
Hierarchy is a broad term, used to refer to the significance of different components in a design. The objects, images, or words that you want the viewer to notice first are at the top of your design’s visual hierarchy, while those that you don’t want attracting notice are at the bottom.
“Study your design concept and take note of what attracts your eye first, where you look next, and how your eye moves along the visual elements of your design,” advises Tomato Soup. “Is a relationship implied in the ordering, grouping, and placements of your graphical elements?”
Balance is a design tactic that causes the viewer to perceive equal distribution of visual elements. It’s important to note that balance can be achieved through both symmetry and asymmetry. One can create the illusion of balance, for example, by using a small shape at a design’s edge to offset a large one at its center.
Unity and Variety are exactly what they sound like. Unified elements are similar to one another, while varied elements are distinct. In order for a design to be visually appealing, there must be a proper balance between the two.
Scale is a fairly simple term used to refer to size. It’s closely related to contrast, and can be used to create depth or draw the eye by positioning components of different sizes near one another.
It’s important to note that the next few design principles are closely-related to photography. There’s a reason for that. The best photographers have an innate understanding of visual composition and design; by studying how they arrange their pictures, you can gain a better understanding of what your shirt should look like.
Dominance is a tactic where one element is given all the focus, with everything else being subordinate. Again, many superhero costumes are subject to this principle, with the logo positioned at the center of their chest as the dominant element. Dominance can be established through contrasting scale, size, color, position, and shape.
Framing involves positioning secondary objects around a subject in order to establish it as a focal point. A photograph of Billie Holiday taken by William Gottlieb, for example, makes Holiday the focus by surrounding him with dark space and offsetting that with minor patterns.
Foreground, Middle Ground, and Background are actually fairly self-explanatory. They refer to the three distinct ‘visual planes’ of an image. In photographs, the background is at the top, the middle ground is in the middle, and the foreground is at the bottom, as the dominant element. With visual designs, these three planes are most often established through scale.
The Rule of Thirds is perhaps one of the most interesting visual design elements we’ll discuss today. To invoke it, simply take your design and divide equally using two horizontal lines and two vertical lines. Important elements – components of your design that you want the viewer’s attention to be drawn to – can be placed either along those lines or on the points at which they meet.
It’s important to note that the Rule of Thirds cannot be applied to every single shirt design (nor should it).
The Rule of Odds states that objects grouped in odd numbers tend to be more pleasing to the eye. Again, consider the T-shirt we designed in the previous blog post – the reason it was so visually pleasing is that there was only one of each element on the front – one heart and one paint splatter. Anything more would have been overkill.
The Rule of Space is one that a lot of novice photographers frequently mix up with the rule of thirds, simply because they’re so closely interrelated. It maintains that in order to create an aesthetically appealing design, you need to leave a certain amount of clutter-free ‘white space.’ Otherwise, your designs will very likely end up looking downright ugly.
Step Five: Branded Shirts

Now that you’ve got at least a beginner’s handle on the elements of visual design, let’s talk a bit about what’s involved in creating a branded shirt. Those of you who are putting together a shirt for personal use can probably skip this section. It’s aimed solely at those who want to use their shirts as marketing materials or prizes.
It’s worth mentioning at this point that the same basic branding principles apply to designing a shirt as to designing any other branded item. With that in mind,
- Design with your audience in mind. At every stage in the design process, you should be looking at your target audience and asking yourself “would they want to wear this?” If at any point your answer is ‘no,’ you need to rethink your design.
- Think about how you want people to feel. Do you want to pump people up? Inspire and excite them? Get them passionate about a cause? Different colors and compositions inspire different emotions – the color blue, for example, is very calming and comforting, while red is powerful and passionate. Experiment, and see how your design makes you feel.
- Have your brand in mind from the outset. Remember when we said that a design created without a core idea will ultimately fall flat? That’s doubly true for a branded shirt, which needs to convey the essence of your brand.
- Remember that branded design is more than a logo. Logos can be changed. Your brand’s identity is what truly sticks with people – the feelings it inspires; the emotions and thoughts it creates in your audience.
Step Six: Legalese
Before we move on to talking about the printing process, I’d like us to stop for a moment and consider legal matters. You need to be careful about the sorts of images and artwork you use in your shirt’s design, after all – use something that you don’t have the rights to, and you’re bound to land yourself in legal hot water. Similarly, it’s important to ensure that you sign an ironclad contract with any artists or designers you bring on.
It needs to be established from the outset that any materials or elements they create for your shirt while under your employ are yours, and not theirs.
Step Seven: The Printing Process
You’ve figured out what sort of shirt you want. You’ve created a compelling design based on the elements of visual composition, and finalized it. Now it’s time to start thinking about the logistics of the printing process. There are a few questions you’ll need to answer at this stage:
- What materials do I want my shirt to be composed of?
- How much money to I have to spend on this endeavor? How much will printing, shipping, and handling cost?
- What sort of printing format do I want to use for my shirt? As we noted in a previous post on T-shirt facts, there are multiple methods, including screen printing, heat press, direct to garment, and dye sublimation.
- What size or sizes do I need?
- When do I need these shirts delivered by?
Step Eight: A Few Final Thoughts
Let’s conclude this piece with a few final words of advice that’ll help you collect your thoughts when you finally set out to design your shirt.
- Sometimes, simpler is better. Make things too complex, and you might wind up with something that looks confusing or cluttered.
- Designing a shirt takes time – don’t be afraid to experiment, and explore multiple different concepts.
- Take a look at some popular shirts and the trends associated with them, but don’t copy things too directly.